Good Morning everyone and welcome to another
My Creative Time Tutorial Thursday!!!
I shared a card here on Monday for MCT's Manly Monday post showing a fun technique using handmade stencils with MCT dies.
I promised to share a tutorial on how I made that card but instead of reproducing that card, I used the same technique and made 2 different mini cards....
Take a look at my finished projects...

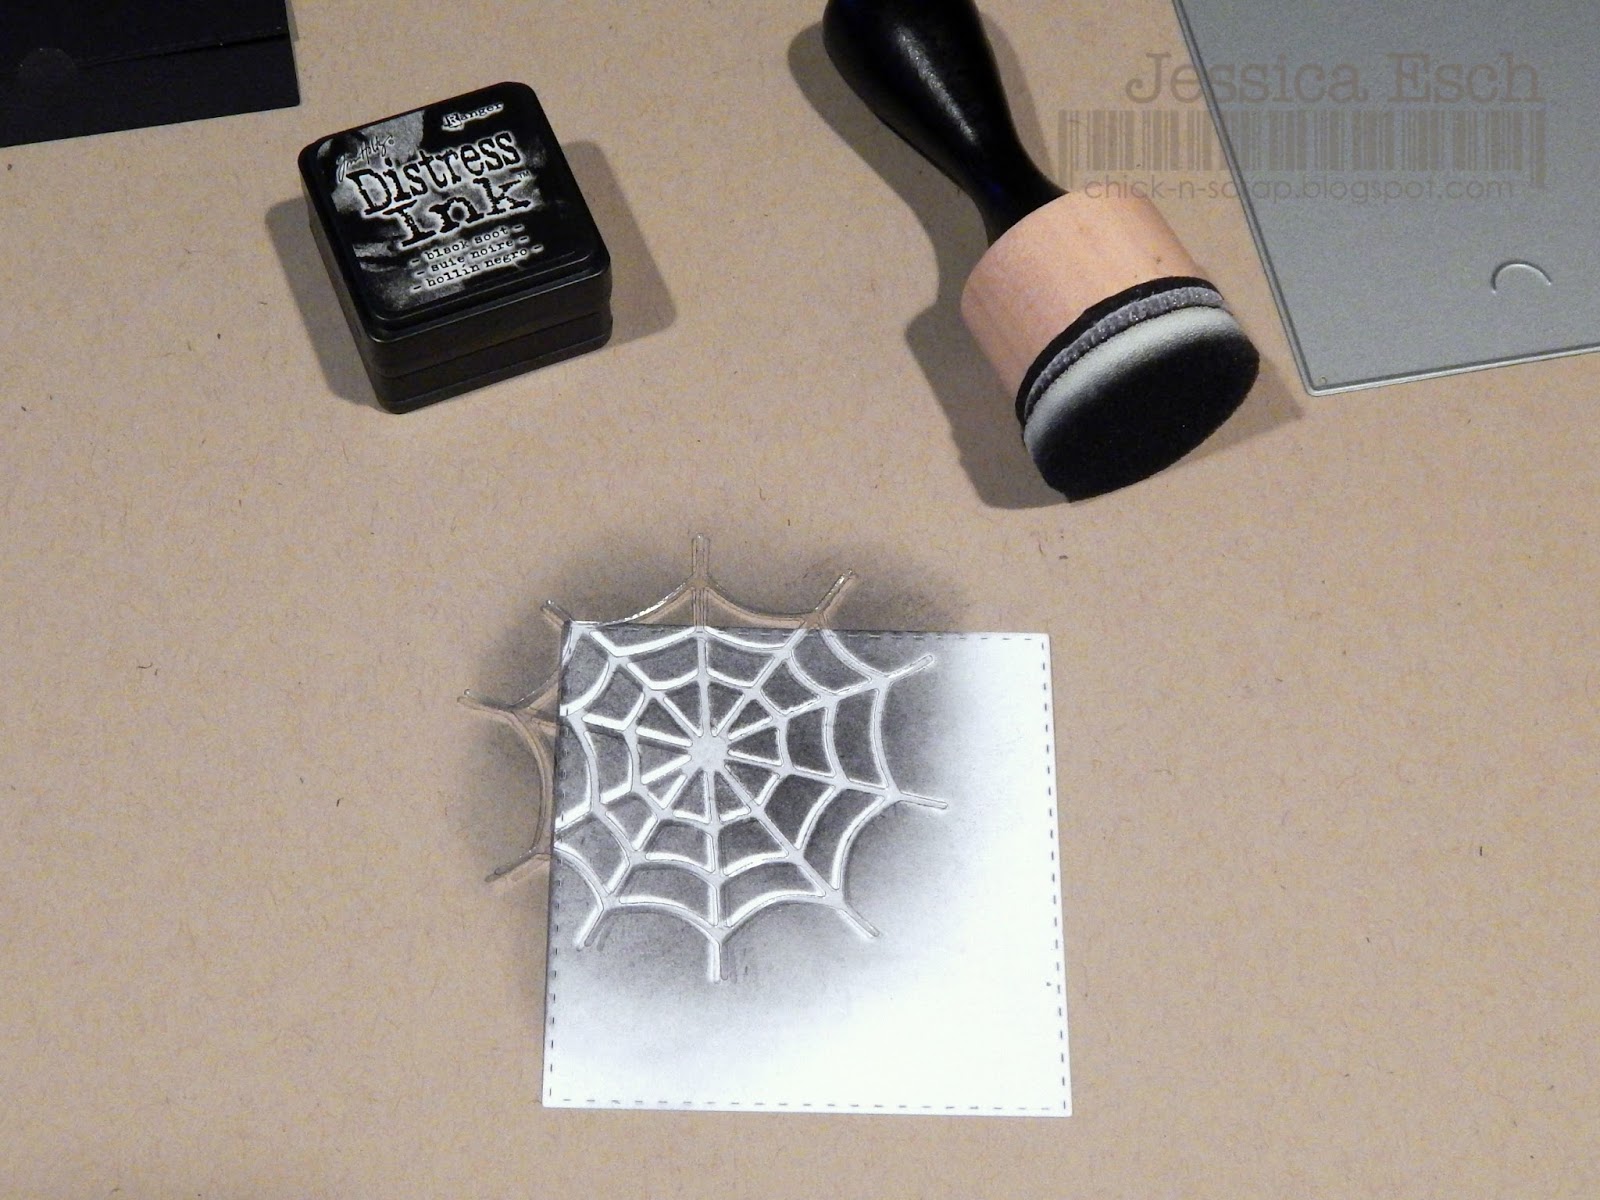
And here is how I made the black and white spider web mini!

I gathered my supplies~
and Black Soot Distress Ink
I die cut the spider web out onto a piece of acetate. Loving the details that this die has it makes for a perfect stencil!

Once the stencil was pulled off giving the desired look, I re-positioned it onto the other corner and inked it up the exact same way.

To finish my mini card, I stamped my sentiment, added that cutie spider and attached the whole white panel to the front of my Just a Note die cut.
~~~~~~~~~~~~~~~~~~~~~~~~~~~
I did the same technique for my pumpkin card, just changing up the die stencil to use the pumpkin and leaf from the Gobble Gobble set


and a bit of Gathered Twigs Distress ink as well!

When I went to add color for the leaf, I used the actual pumpkin die, the inside of my stencil to cover up the pumpkin so I could contain where the Mowed Lawn Distress Ink went. I wanted to add the color only to the leaf part~not the stem and I didnt want it to over lap the pumpkin

I add the panel to the Just a Note die, stamped my sentiment, and my mini was complete!!
The best part of making these stencils~ you can use them over and over again!!!!
Well I hope you have enjoyed my tutorial and will give this technique a try!
Want to see more projects?
Make sure you head on over to My Creative Time to see what the rest of the DT made!
I know the inspiration is AWESOME!!!!
Thanks so much for stopping by and have a GREAT day!!


Great mini cards as well as stencil technique.
ReplyDeleteOMG Miss Jessica...WOW....Your stencil idea is Outstanding...thanks for your awesome tutorial! and pictures....the results you achieved is spectacular!! I have lots of acetate, the dies and the inks & daubers so definitely I'm going to be doing this. Your note cards are beautiful so thanks again for sharing. you sure did outstanding creative jobs. YOU so ROCK!!
ReplyDeleteLooks like fun!
ReplyDeleteBeautiful cards. I am going to try this technique. This is a great use for all of the packaging I have hoarded.
ReplyDeleteJessica,
ReplyDeleteI love this!! Super cute & Fun!!
Have a wonderful day,
Migdalia
Crafting With Creative M
Great tutorial and cards! I really like how the web stencils and you could use the positive and negative parts of your die cut acetate. I love the shading on your pumpkin. Wonderful job.
ReplyDeletequilt 4 fun 2 at hot mail dot com
Super fun projects, love how you used the stencils and even love how you created them!
ReplyDeleteBeautiful cards, great technique! TFS
ReplyDeleteThese are awesome Jessica, great tutorial!
ReplyDeleteLove your technique and tutorial on blending Jessica!
ReplyDeleteSherrie K
Fabulous technique! These are awesome cards, Jessica!!!
ReplyDeleteGreat card and fab tutorial. Thanks for sharing!
ReplyDelete