Thursday, September 25, 2014

MCT 36th New Release Sneak Peek Day 4

Good Morning and welcome to Day 4 of sneaks for the new
My Creative Time 36th  Release!
So what did you think of yesterday's projects and sneak??? Pretty AWESOME right???
Wait until you see this set of stamps and dies!!

Today the DT will be showcasing projects using the new set~
All You Need is Coffee

This is so how I start out my morning...a cup of steaming hot coffee while the house is still quiet :)
And here is my inspiration....
How super CUTE are those coffee mugs?? And did you see that fun stitched embossed "steam"?? Plus I am so LOVING the new word die!!
So here is how I made this CAS card. I again used my new favorite die~ the Stitched Rectangle Frame Die for my card mat and added 2 of the new die cut coffee mugs. After positioning them where I wanted them, I used the "steam heart" and embossed it above the cups. For some extra sparkle, I colored it in using my Wink of Stella clear glitter pen.
Next using the sentiment from the new All You Need is Coffee set, I stamped it onto the banner die from the Just Simply Live set. I die cut the "coffee" word using the matching pattern paper and finished off my card with some random enamel dots.

My Creative Time Products Used:
Stitched Rectangle Frame Dies & More (New Release)
All You Need is Coffee (New Release)
Just Simply Live

Other Products Used:
Carta Bella~Giddy Up! paper pad
enamel dots
Wink of Stella pen

***Sneak Peek giveaway!***
We will be giving away the sets we are showcasing each day to ONE lucky winner! For example, the set we are showcasing on Wednesday, Emma will announce the winner of that on Thursday & the sets we are showcasing on Thursday, Emma will announce that winner on Friday in her video!
ALL you have to do is leave a comment on each of our blogs! You are NOT required to comment on EVERY SINGLE blog, but the more you comment on, the better chance you have for winning! VERY IMPORTANT, PLEASE leave a way for us to contact you w/your comment just in case "YOU" are the lucky winner! 
For EXTRA entries, you can spread the word about this release on Facebook, tweet about it OR even instagram it! #mycreativetime!
GOOD LUCK EVERYONE & let's start spreading the word!;)

Thanks so much for stopping by today and I will see you all tomorrow for the big reveal and Blog Hop!!!!
Don't forget to check out what the rest of the DT has made!
They can all be found on the My Creative Time Blog
and as always the inspiration is AMAZING!!!

Wednesday, September 24, 2014

MCT 36th New Release Sneak Peek Day 3

Good Morning and welcome to Day 3 of sneaks for the new
My Creative Time 36th  Release!
Again another AWESOME day yesterday of sneaks right??? We have much more to share!!!!!

Today the DT will be showcasing projects using the new set~
A Thankful Heart
This beautiful set will surely make sending Thanksgiving cards very easy! The perfect sentiments and matching leaf dies are such a great addition to the MCT family!
Here is my inspiration for today.......
Can you tell I just LOVE that Stitched Rectangle Frame die??? I used it again on my card mat, this time die cutting it out using Kraft cardstock and stamping the Grainy Wood Background onto it.
Then using another die from the Stitched Rectangle Die set, I die cut an opening in the center of my card and then cut a very thin frame to add to the outside. I added the die cut "grateful" to the center then stamped the sentiment underneath.
Using the new leaf dies from this set, I die cut 2 different ones (can you see the beautiful embossed design that these have??? They are so pretty). Next I added them to the card front, under some natural hemp twine and a brown button.
Finally I embellished with some random enamel dots and my card was complete!

My Creative Time Products Used:
Stitched Rectangle Frame Dies & More (New Release)
A Thankful Heart (New Release)
Grainy Wood Background

Other Products Used:
Hemp Twine
enamel dots
button
White, Kraft, brown cardstock
My Minds Eye~ Sunshine designer paper

***Sneak Peek giveaway!***
We will be giving away the sets we are showcasing each day to ONE lucky winner! For example, the set we are showcasing on Wednesday, Emma will announce the winner of that on Thursday & the sets we are showcasing on Thursday, Emma will announce that winner on Friday in her video!
ALL you have to do is leave a comment on each of our blogs! You are NOT required to comment on EVERY SINGLE blog, but the more you comment on, the better chance you have for winning! VERY IMPORTANT, PLEASE leave a way for us to contact you w/your comment just in case "YOU" are the lucky winner! 
For EXTRA entries, you can spread the word about this release on Facebook, tweet about it OR even instagram it! #mycreativetime!
GOOD LUCK EVERYONE & let's start spreading the word!;)

Thanks so much for stopping by today and I will see you all tomorrow for the Day 4 of sneaks!
Don't forget to check out what the rest of the DT has made!
They can all be found on the My Creative Time Blog
and as always the inspiration is AMAZING!!!

Tuesday, September 23, 2014

MCT 36th New Release Sneak Peek Day 2

Good Morning and welcome to Day 2 of sneaks for the new
My Creative Time 36th  Release!
So what did you think of yesterday's projects and sneak??? Pretty AWESOME right???
Well there is TONS more!!!!

Today the DT will be showcasing projects using the new set~
Wicked Fun Dies & Trick or Treat
I am super exited for these stamps and dies! I just LOVE Halloween time and these are so perfect for all your Halloween projects!
Here is my card for today.... Have to say I LOVE this one :)
OMG how fun is that spider and web?? Emma really knows how to WOW us all with her creativity when it comes to designing new stamps and dies!
Anyways I wanted to keep the spider, his web and the sentiment as my focal point so I made my card pretty simple. I again used my new favorite die~ the Stitched Rectangle Frame and die cut one layer in designer paper. I made a smaller rectangle shape using the same die to layer on top. Before adding the layer, I die cut the new web and cut it in half to place behind the top rectangle layer. I wrapped it with some Trendy Twine and adhered it to my card mat. Next I die cut that fun new spider, stamped my sentiment onto some white card stock and die cut it out using one of the Bunches of Circle Dies. 
I then popped the sentiment up onto the card as well as popping the spider up hanging down from the sentiment. I added a glittery enamel dot to the spot where the spider web hangs down to the spider and my card was complete!
My Creative Time Products Used:
Stitched Rectangle Frame Dies & More (New Release)
Wicked Fun Dies (New Release)
 Trick or Treat (New Release)
Other Products Used:
My Minds Eye~Haunted Paper Pad
white and black cardstock
Orange Licorice Trendy Twine

***Sneak Peek giveaway!***
We will be giving away the sets we are showcasing each day to ONE lucky winner! For example, the set we are showcasing on Wednesday, Emma will announce the winner of that on Thursday & the sets we are showcasing on Thursday, Emma will announce that winner on Friday in her video!
ALL you have to do is leave a comment on each of our blogs! You are NOT required to comment on EVERY SINGLE blog, but the more you comment on, the better chance you have for winning! VERY IMPORTANT, PLEASE leave a way for us to contact you w/your comment just in case "YOU" are the lucky winner! 
For EXTRA entries, you can spread the word about this release on Facebook, tweet about it OR even instagram it! #mycreativetime!
GOOD LUCK EVERYONE & let's start spreading the word!;)

Thanks so much for stopping by today and I will see you all tomorrow for the Day 3 of sneaks!

Don't forget to check out what the rest of the DT has made!
They can all be found on the My Creative Time Blog
and as always the inspiration is AMAZING!!!

Monday, September 22, 2014

MCT 36th New Release Sneak Peek Day 1


Good Morning and welcome to Day 1 of sneaks for the new
My Creative Time 36th  Release!

Miss Emma has another AMAZING new release and the DT can not wait to share all of our projects with you! We all know you are going to LOVE everything in this release.
So sit back and get ready for a GREAT week of inspiration followed by our blog hop on Friday when we will show you all the entire new release and it will be available for purchase!

Today the DT will be showcasing projects using the new set~
Rectangular Stitched Frames & More
we have been sneaking the rectangle stitched frames for a while now...getting you all super excited about this new die!!! So here is the card I made using this new set.... 
Aren't those card mats just AWESOME???  Sure love the stitching that Miss Emma added to these!! 
So here is how I made my card. I die cut 2 of the different shaped rectangle dies, one in white cardstock and the other in the designer paper. I added a smaller rectangle stitched die in between the two layers by using the same die and just manipulating the cuts to make the size I wanted. Next I die cut both of the new frames, again in my matching designer paper and stamped my sentiment onto the bottom right hand corner.
Next I added some of the leaf dies cuts from the Piles of Smiles set and tied them all together using some orange hemp twine.
I corner layer of burlap for texture and some random enamel dots and my card was completed!

My Creative Time Products Used:
Stitched Rectangle Frame Dies & More (New Release)

Other Products Used:
white, kraft cardstock
Echo Park~Reflections Fall paper pack
Burlap
Hemp Twine
enamel dots

***Sneak Peek giveaway!***
We will be giving away the sets we are showcasing each day to ONE lucky winner! For example, the set we are showcasing on Wednesday, Emma will announce the winner of that on Thursday & the sets we are showcasing on Thursday, Emma will announce that winner on Friday in her video!
ALL you have to do is leave a comment on each of our blogs! You are NOT required to comment on EVERY SINGLE blog, but the more you comment on, the better chance you have for winning! VERY IMPORTANT, PLEASE leave a way for us to contact you w/your comment just in case "YOU" are the lucky winner! 
For EXTRA entries, you can spread the word about this release on Facebook, tweet about it OR even instagram it! #mycreativetime!
GOOD LUCK EVERYONE & let's start spreading the word!;)

Thanks so much for stopping by today and I will see you all tomorrow for the Day 2 of sneaks!
Don't forget to check out what the rest of the DT has made!
They can all be found on the My Creative Time Blog
and as always the inspiration is AMAZING!!!

Thursday, September 18, 2014

Congrats on Your New Arrival....{Trendy Twine DT}

Good morning everyone! 

It is my turn to share a project over on the Trendy Twine blog!
All month long the DT is sharing baby projects using the Chocolate Cupcake and Chocolate Sprinkles Trendy Twine.
For my project today I made some baby boy shower favors. I really LOVE the way these turned out!!!
How fun would these be to give to your shower guests? Now I made mine for a baby boy but change up the colors and add some Chocolate Cupcake Trendy Twine and you can make these for a baby girl too. To make these~ which is very quite simple, I used the Medium Candy Bags and wrapped my chocolate nuggets using matching blue and brown cardstock. Once they were all wrapped, I slid them into the candy bags and sealed them up, punching a hole in the top to add my tags.

Next, for my tags, I used the dies from My Creative Time and layered some white cardstock on top of the matching brown cardstock. I stamped my sentiment onto the bottom  using the Many Greetings stamp set from MCT and then using my Cameo and a file I picked up in the Silhouette Store, I cut the adorable elephant.
I popped him up onto the tag, adding a black enamel dot for his eye and then tied the tag onto the candy bag with a double bow of the Chocolate Sprinkles Trendy Twine.
So aren't these fun???? Sure to be a hit at a baby shower for sure.

My Creative Time Products Used:

Trendy Twine Products Used:

Other Products Used:
Elephant cut file~Silhouette Store
gray, blue and white cardstock
Enamel Dots
Nugget candies

Stop by and have a look at the gorgeous twine and so many other fun items in the store HERE

While you are there make sure to look at these PERFECT baby twine colors!!!
Chocolate Cupcake Trendy Twine - Pink & Brown Bakers TwineChocolate Sprinkles Trendy Twine - Blue & Brown Bakers Twine
New to Trendy Twine??? Check out the other places where we share our projects .....
Trendy Twine Blog~ HERE
and the
Trendy Twine Facebook page~ HERE
Don't forget to visit the 
 new and improved, packed with tons of product
 Store HERE

Thanks so much for stopping by.
 I hope you have enjoyed my project and have a great Thursday!

Wednesday, September 17, 2014

Trendspotting SEQUINS w/ PKS!

Hi everyone!
This is my second post for today :)

~If you are looking for my Inspiration Wednesday project with My Creative Time please click HERE or scroll down to the next post~

I'm on the Peachy Keen Stamps blog today to share a trendspotting project with you today.  
My inspiration came from a picture I saw on Pinterest of these sequins. 
Mercy Tiara: Scraproom Sunday: Sequin Storage
Pinterest image found HERE
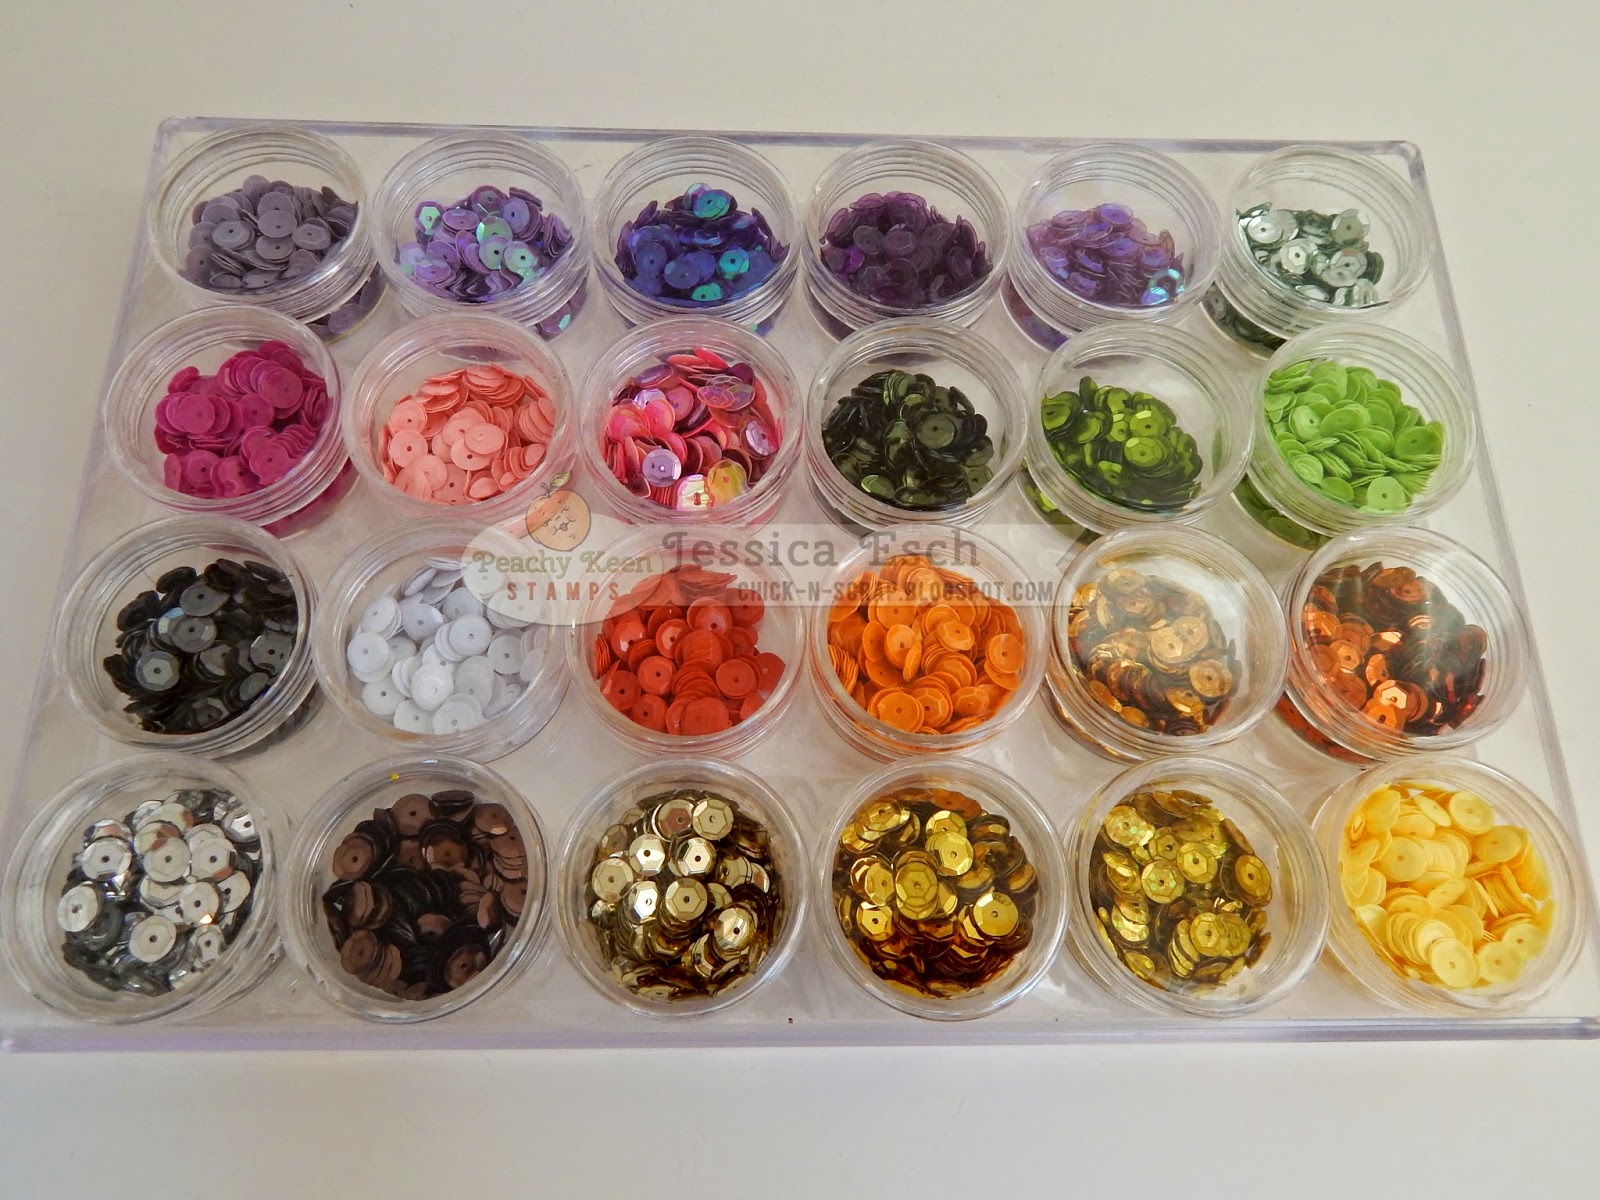
I LOVE using sequins on my projects and making shaker cards and tags. Since I have a growing supply of sequins, I am always looking for ways to store them. Pinterest to the rescue :) I actually started storing my sequins in these little glass jars but quickly realized that there is no good way in my small craft space to organize them. So I took to another storage solution....
This is only a few of my sequins...It is the perfect storage solution for me! The container trays can be stacked on top and placed on a shelf..out of the way but still accessible when I am searching for the colors I need for a project.

Now onto my project....I love how fun a card or tag can be when it is made into an interactive one, such as a shaker. I have 2 shaker tags to share, perfect for adding to a treat or gift bag.
Since Halloween is right around the corner and Christmas will be here before we know it, I made these 2 holiday tags. Let's take a closer look at them.
 *******************
 My first tag is this cute Halloween one. I used some green and orange sequins for this shaker and added them to the center of a tag I designed in the silhouette studio. This is a very simple tag design, a basic tag shape with a smaller tag shape cut out of the center. If you have never made a shaker card, there are several tutorials on Pinterest and/or YouTube. They are very easy to make!
Anyways once my shaker part was finished I embellished the front with the pumpkin from the Cottage Cutz set and stamped his face using the Pumpkin Face stamp set. Before completely assembling the tag, I did stamp the inside of the shaker part with my Halloween sentiment.
I finished my tag off with some more randomly places sequins, a May Arts ribbon, a fun sparkly button and some Totally Black Trendy Twine.

Peachy Keen Stamps Used:
*********************************
Here is my Christmas shaker tag. It was done the same way as the Halloween one, except I added green and red sequins inside the shaker part. I found this cute Christmas tree in the Silhouette store and just added my sweet PKS face to him. Some chalk and white gel pen to his cheeks for a little more cuteness and he was placed onto my tag. 
I finished off the tag in the same way as well. Some May Arts ribbon, a green sparkly button and some Totally White Trendy Twine.

Peachy Keen Stamps Used:

So there is my trendspotting project. I know I love adding sequins to my projects.
These are a few other cards I have made using my PKS and sequins :)
Sequins make awesome embellishments
and
if you have yet to make a shaker card....you should really give it a try!
They are so fun and whomever receives one will surely LOVE it!!!

Hope you like these project and find some inspiration from it, thanks for stopping by and have a GREAT hump day!


Bulldogs Football LO.......{Inspiration Wednesday w/MCT}

Good Morning and Happy Hump day everyone!

 It is time for another 
Wednesday Inspiration with My Creative Time 
where the DT makes a project of our choice based on an inspiration subject.

My inspiration for today's project is my son Casey :)
He is currently in the 8th grade and playing football for both the town we live in as well as Modified for the school. Let's back it up a bit and I will tell you his story.
This is his 3rd year playing football. He spends a lot of time in the yard playing ball with his brother, friends and my husband. When he said he wanted to play football for a team we thought that would be awesome! It is pretty popular among his friends and in our town so we signed him up. The first year he played..he didn't see a whole lot of the field. Just they way it was with the coach and seeing that he was a newbie he was played his "required" by the organization, which was at least 5 plays and then when we played "b" games. BUT that didn't discourage him. He was a lineman and wanted to try other positions as well. SO he went up to the coach and asked if he could try playing center and snapping the ball. The coach let him try it...he turned out to be pretty good and then became the second string center. He was excited.
Last year that was his starting position. He worked his tail off during the summer...practicing his snaps with my husband and come game time it sure showed. He was again super excited with his season. The quarterback's dad asked Casey last year to make sure he played Modified this year because they did not have a center :) Well he was already planning on it and would have played last year but it was kinda known that 7th graders don't play that much so he waited until this year.
Now fast forward to this year....he is the starting center for the Bulldogs which is our town's team as well as the starting center for Modified!
So this LO is for him, to show him how proud I am of him and all his hard work. Also to show that with determination and motivation you really can be the best you can be!
Now for the details on my project :) Their football colors are Black and Maroon so I went with those, using a maroon cardstock base and a fun football designer paper mat. I did add a decorative stitching frame around the outside for a little extra detail.
I printed out 2 pictures of Casey from his last game, die cut them out using the new (sneak-peek) Rectangle die. I matted it on white cardstock and again on black (also die cut using the rectangle die)

For the "Bulldogs" I die cut 2 sets of letters using the Uppercase Fun Dies. Once in maroon and again in white so I could shadow them. I embellished this section with some enamel dots as well.

To finish my LO off, I added the year using the Number Fun Dies, again cutting them 2 times so I could shadow them. I stamped the sentiment onto the frame from the new Love to Learn set and used the outside of the frame to make a rectangle piece. I love the stitching that Emma adds to her dies and wanted to use both the inside and outside of the cuts.
Finally I stamped my sentiment using the perfect wording for my LO from the Sports Sentiments set. A few more enamel dots and this was completed.

My Creative Time Products Used:
Rectangle Frame Dies (sneak peek)

Other Products Used:
Football designer paper
Maroon, Black and White cardstock
Enamel Dots
sewing machine

So what do you think????? Want to see more projects?
Make sure you head on over to My Creative Time to see what the rest of the DT made!
I know the inspiration is AWESOME!!!!

Well I hope you have enjoyed my inspiration. Thanks so very much for stopping by and I will catch you all in a few hours with my PKS Trendspotting project :)
Have a GREAT hump day!!!

Don't forget that the MCT DT starts sneaking the new release on Monday!!!
You are going to LOVE the new products!!!!!
We all hope you will join us for an AWESOME week of sneaks followed up with the BIG reveal and blog hop!!